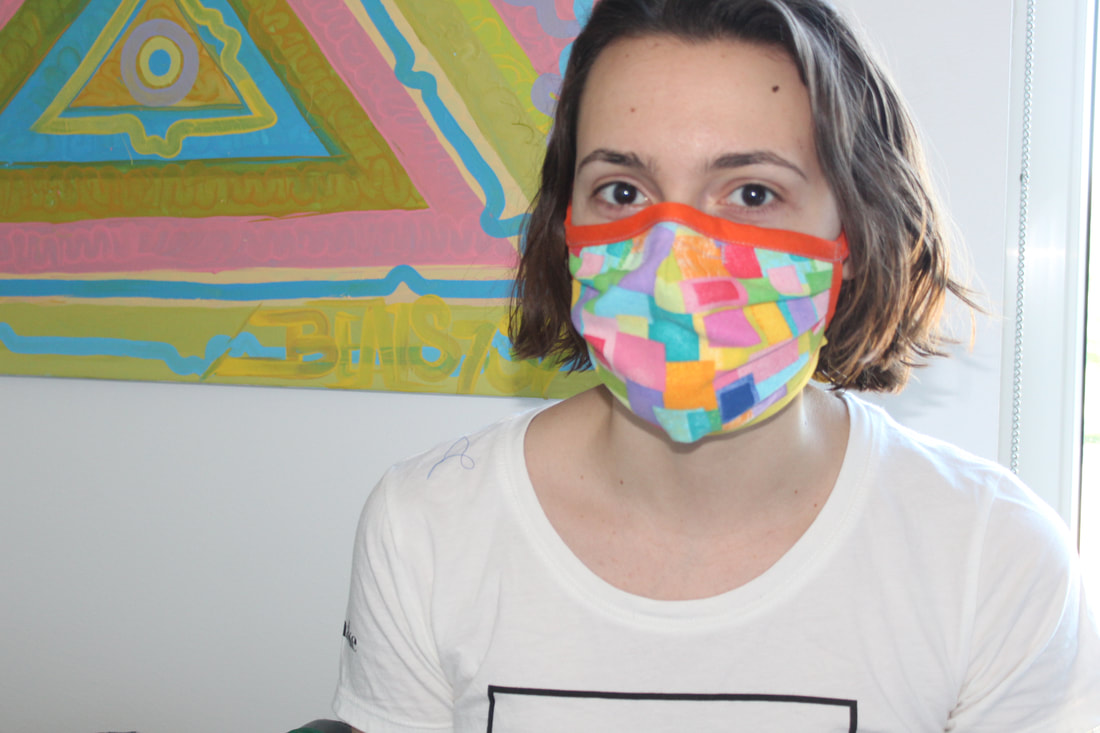
How to Sew Your Own Fabric Face Mask
DoneGood's Designer & Advocate for Good here! You can purchase a mask from one of our approved brands, but some of you may want to make your own mask. That's where I come in.
I've read a bunch of tutorials, done some testing, and combined the best aspects of the face masks I've seen, and am here to break it all down for you. I've sent these to friends and family who are first responders, who are wearing them over their N95s, but also have made a few for my neighbors and people who I know who haven't had a chance to buy or make their own masks.
This article is great to read and keep in mind while making this mask. I personally don't have any coffee filters or anything besides fabric to add to my mask, but if you have a filter, you could layer it in between during Step 3.
For your convenience, I also filmed myself making the mask:
New to sewing? I think you should be able to keep up! Feel free to use more pins, rely more heavily on the handwheel to sew slowly, or whatever you need.
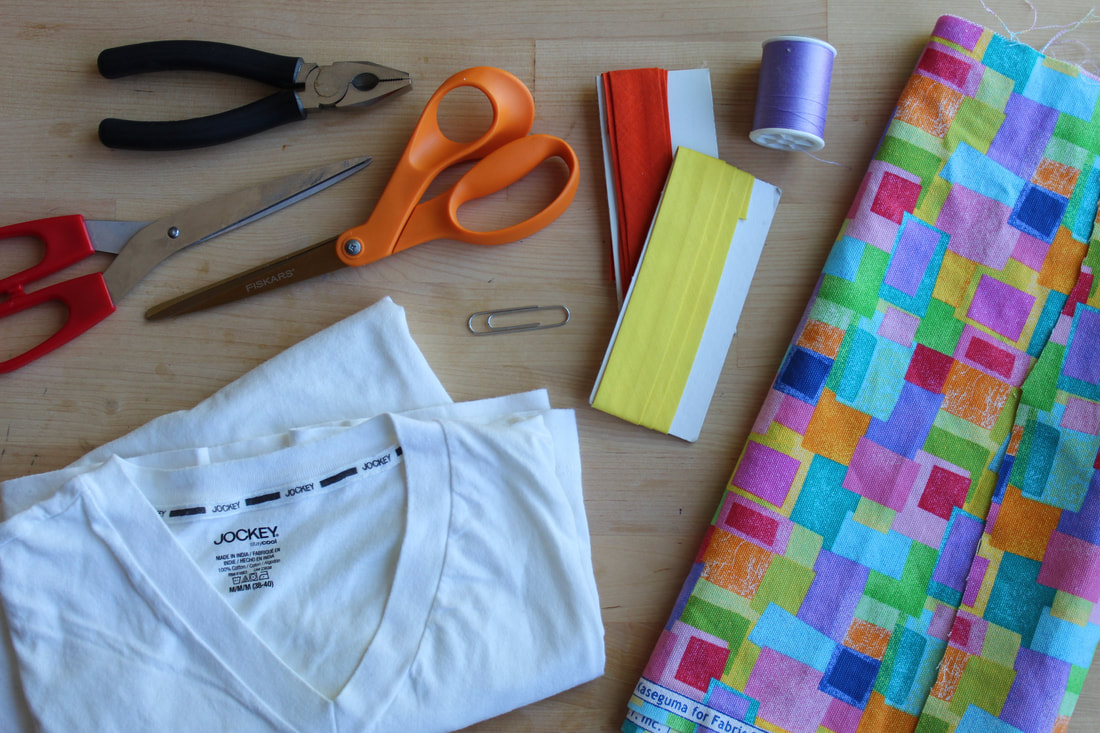
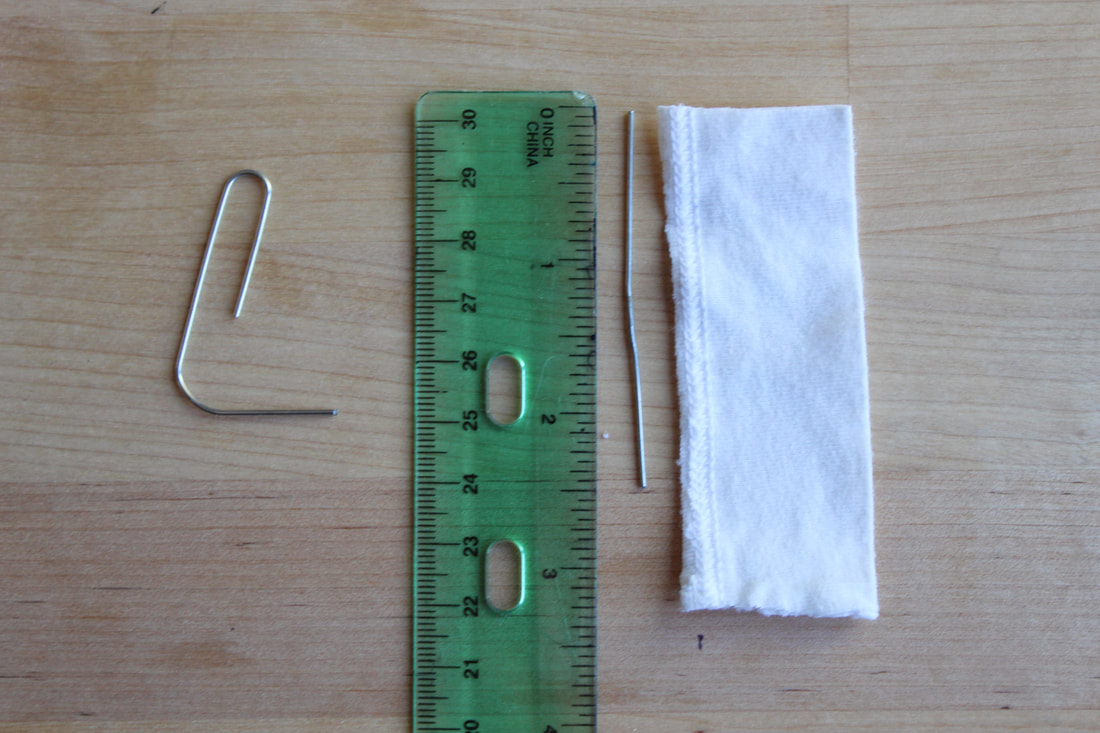
Supplies:
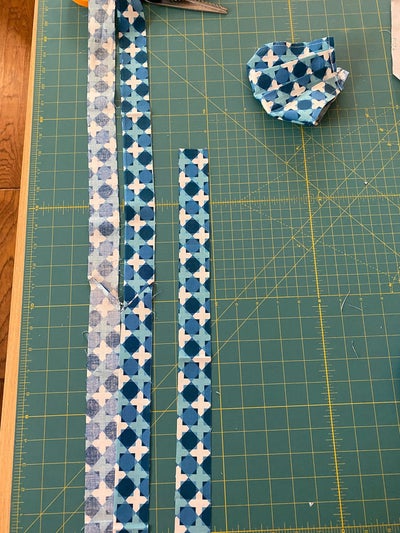
- Fabric: 100% Cotton is ideal, a tighter weave as well. This colorful fabric was a thicker cotton canvas leftover from a pillow making project. I've also used denim with success, and if you don't have any fabric scraps, you can just use two pieces of the cotton jersey from the t-shirt.
- Cotton t-shirt: Have a promotional shirt you got for free but never wear? Or a shirt where the armpits may be discolored? Make sure your shirt is clean, and ideally not to worn out, so you can use it for this project!
- Tie supplies: I have used bias tape, woven ribbon, and made ties out of my fabric. Bias tape is ideal, but no worries if you don't have it! Your tie supply width should be between 1-1.5 inches, we'll go into this later.
- Thread/Bobbin: Color doesn't really matter, if it matches, great!
- OPTIONAL Paper clip & wire cutters: If you're making this to wear over an N95, your call on if the wire over the bridge of your nose will be helpful. Maybe it is ideal if you wear glasses. The pattern for this mask is already darted to fit the nose more closely, the paper clip just gives it a bit more structure.
- Iron
- Scissors
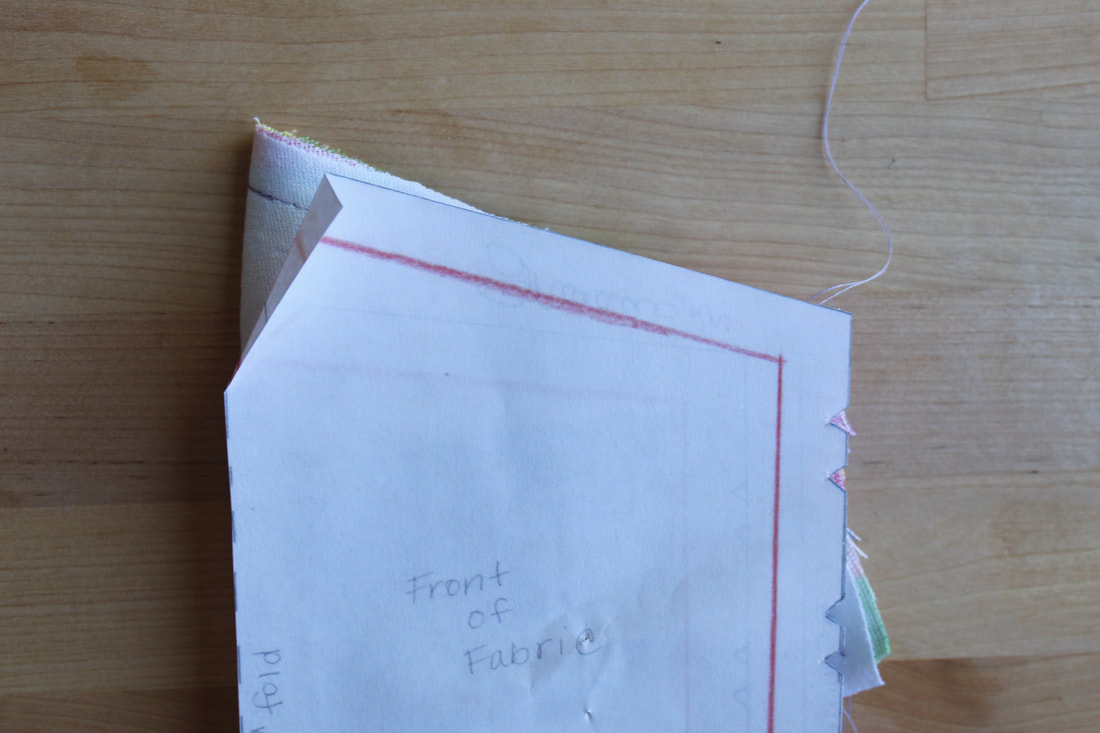
Step 1: Print & Cut the Pattern Out
The base of this mask comes from Jessica Nandino. Her mask tutorial can be found here. Please print her pattern.
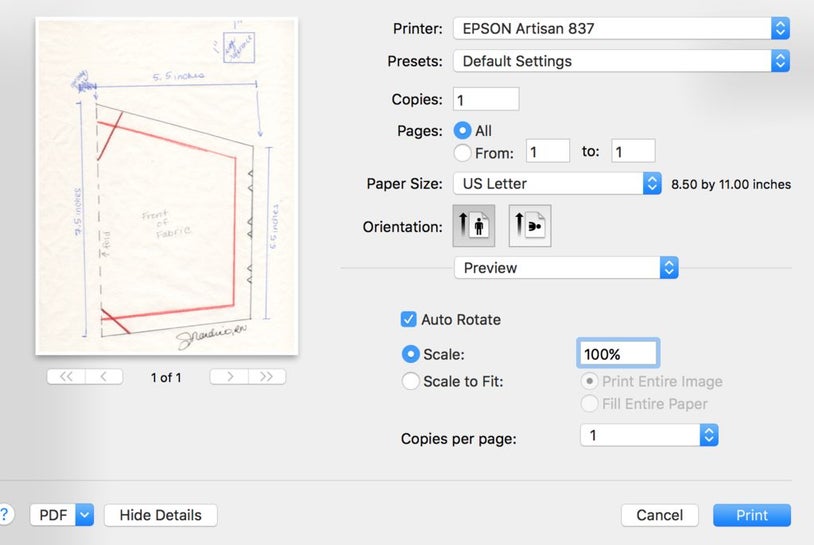
Make sure your paper size is accurate and the sale is at 100%. Cut out pattern. Cut along straight black lines and dotted black line.
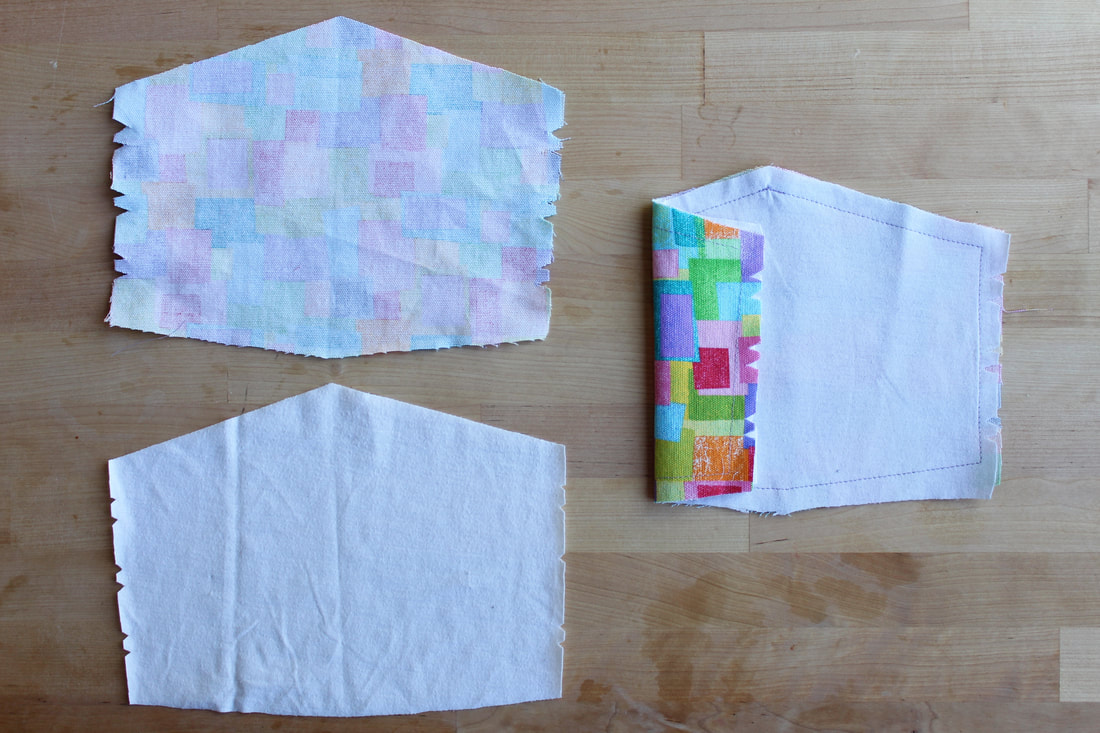
Step 2: Cut Your Fabric
The t-shirt material will become your lining fabric, the fabric that sits touching your face. When folding your fabric, try and keep in mind the grain of the fabric. Line up your fabric aligned with the grain. For the t-shirt, you may be able to see slight lines…try and position your pattern so that the lines you see would intersect with the notches.
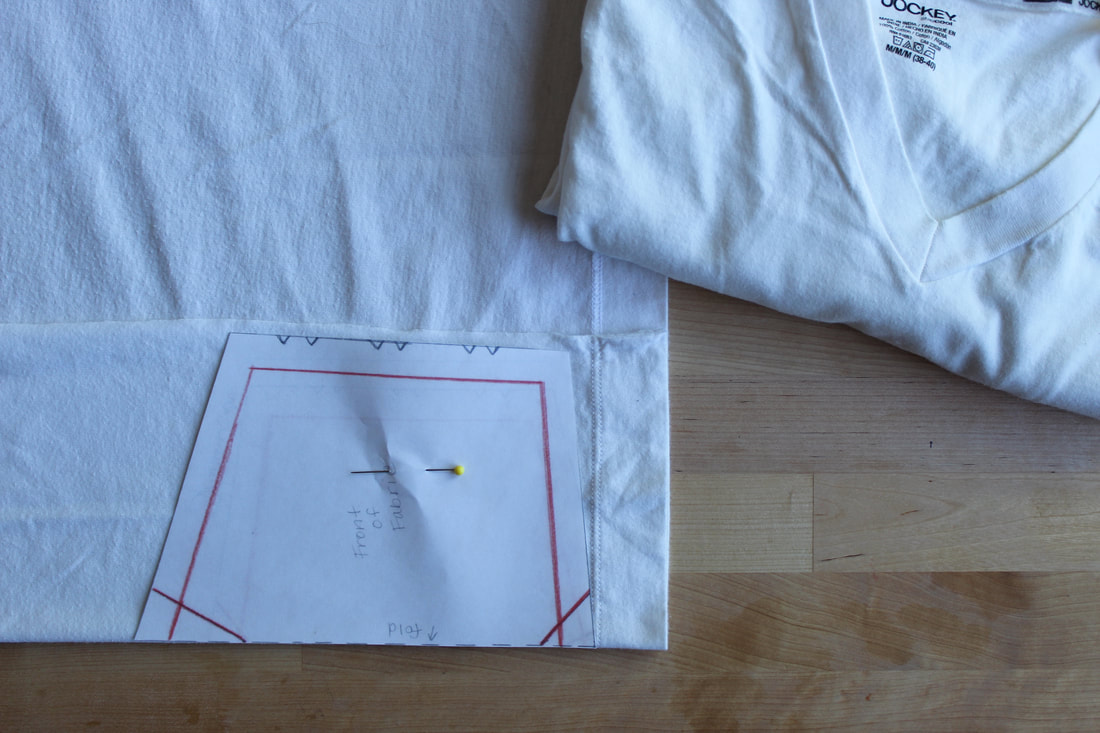
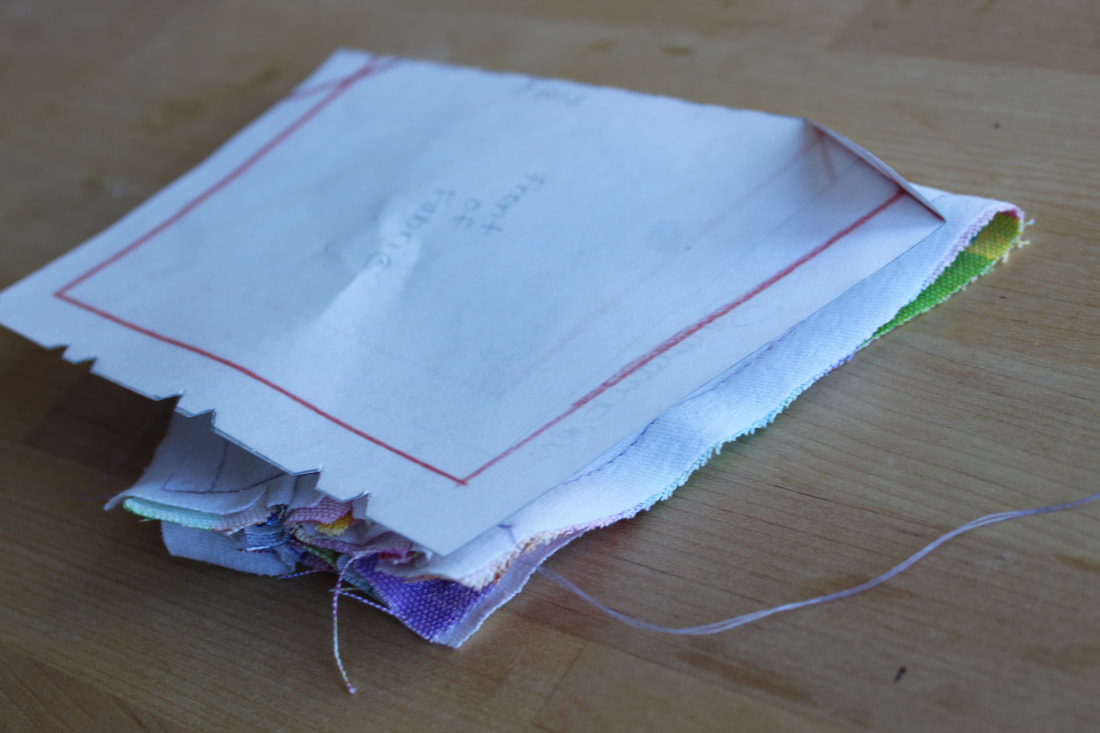
Fold your fabric and place the pattern on the fold. Pin in place if helpful.
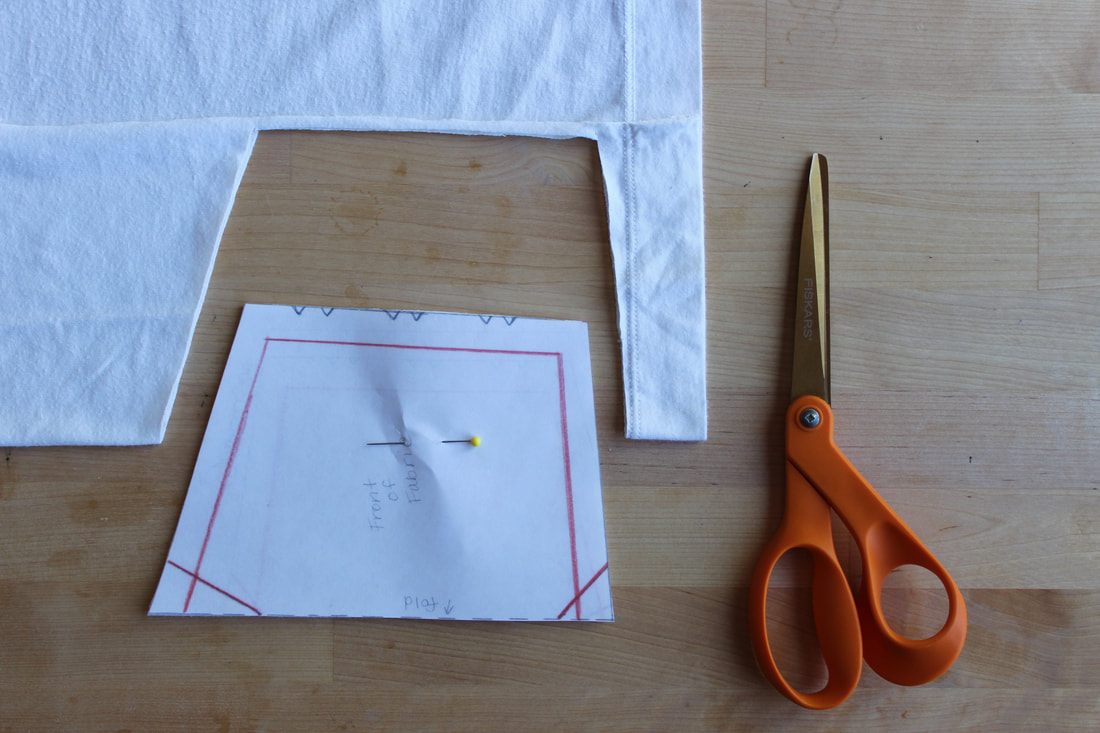
Cut out pattern.
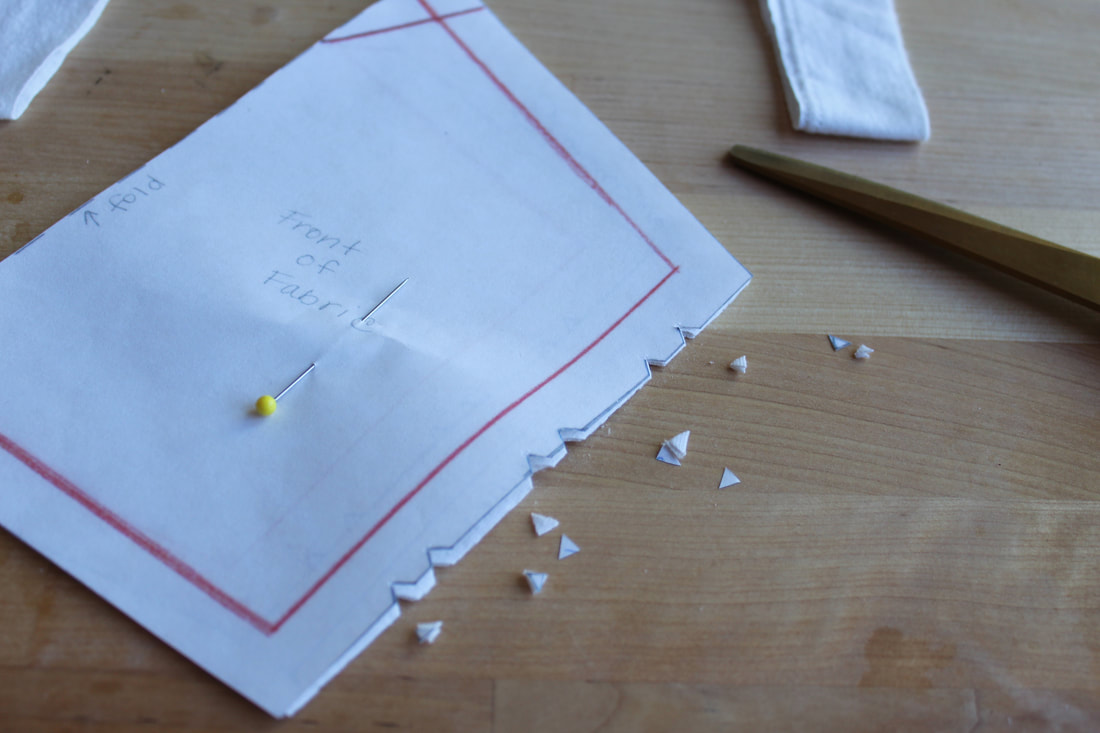
Cut out notches. These will help you with the pleats later on.
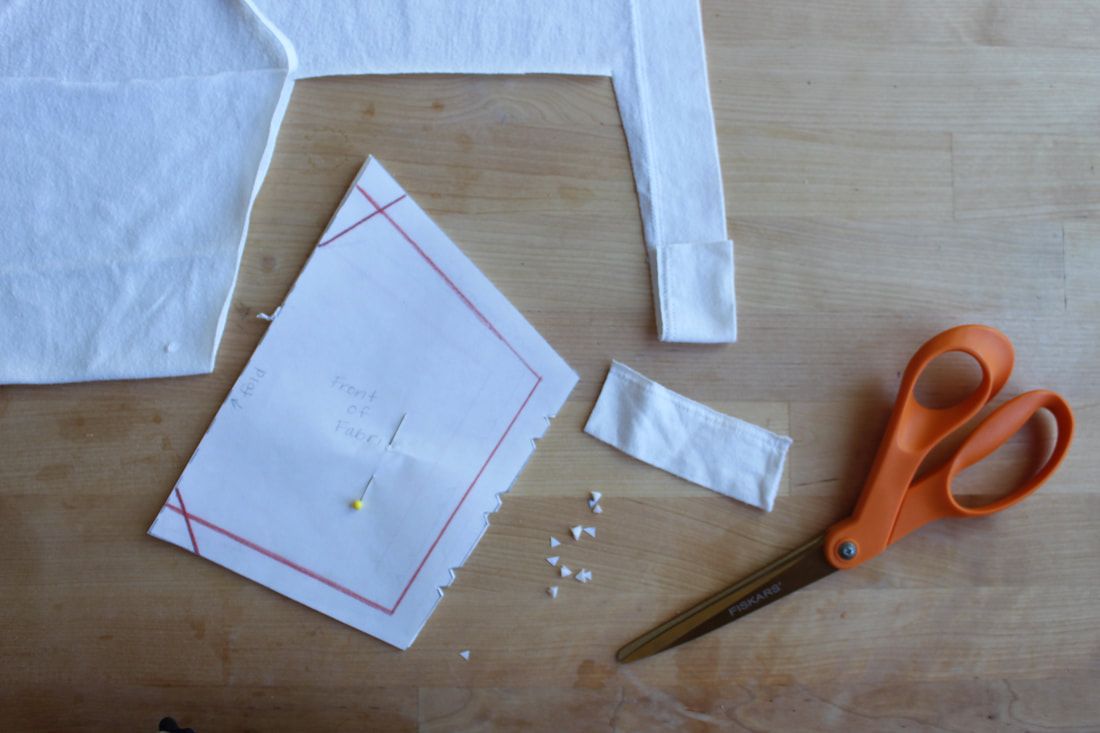
**From the t-shirt, cut a piece of the hem. This is only needed if you are using the paperclip to form the nose piece.
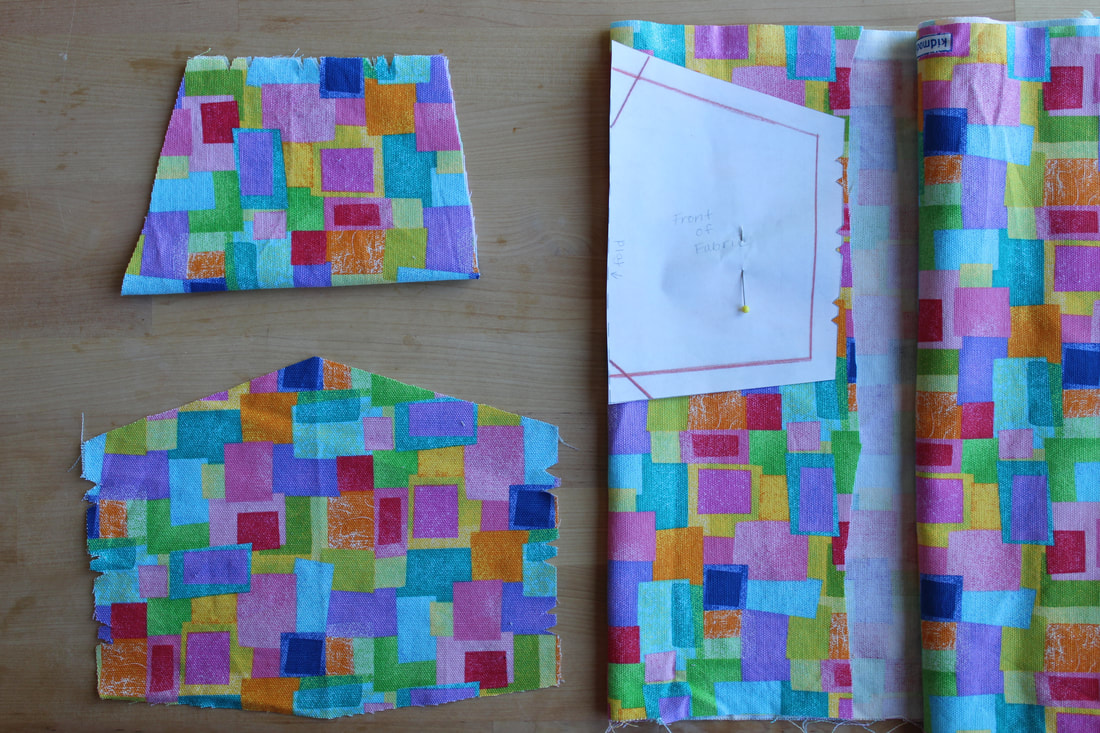
Repeat process with your second fabric.
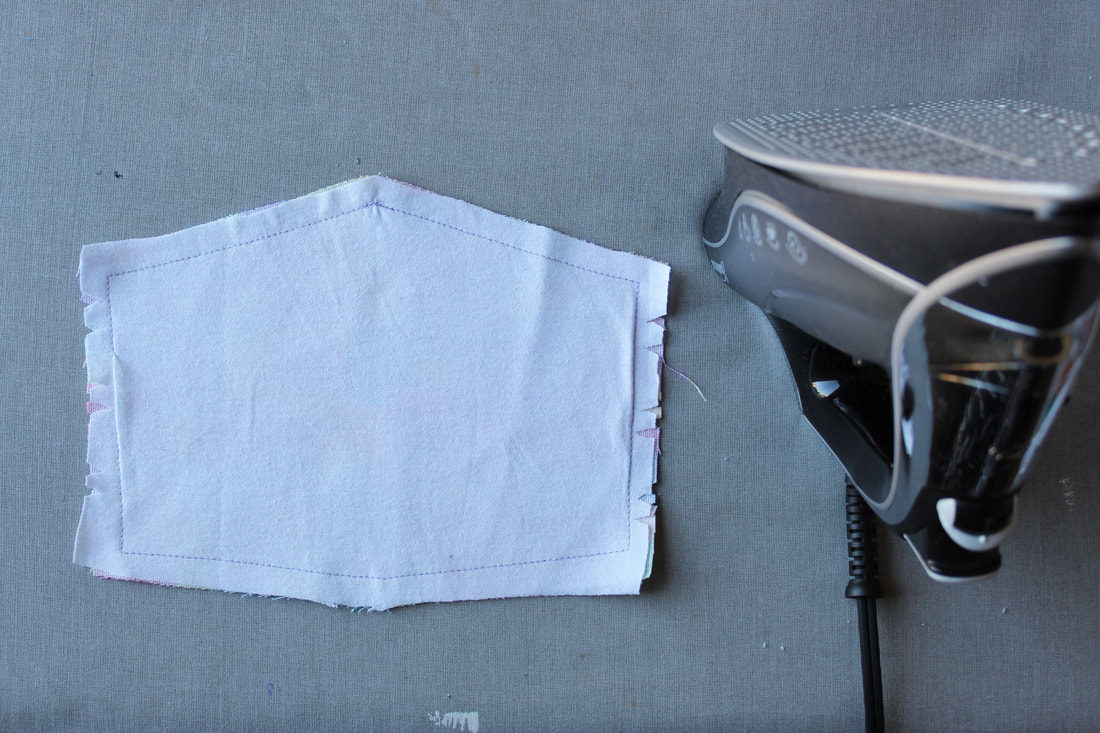
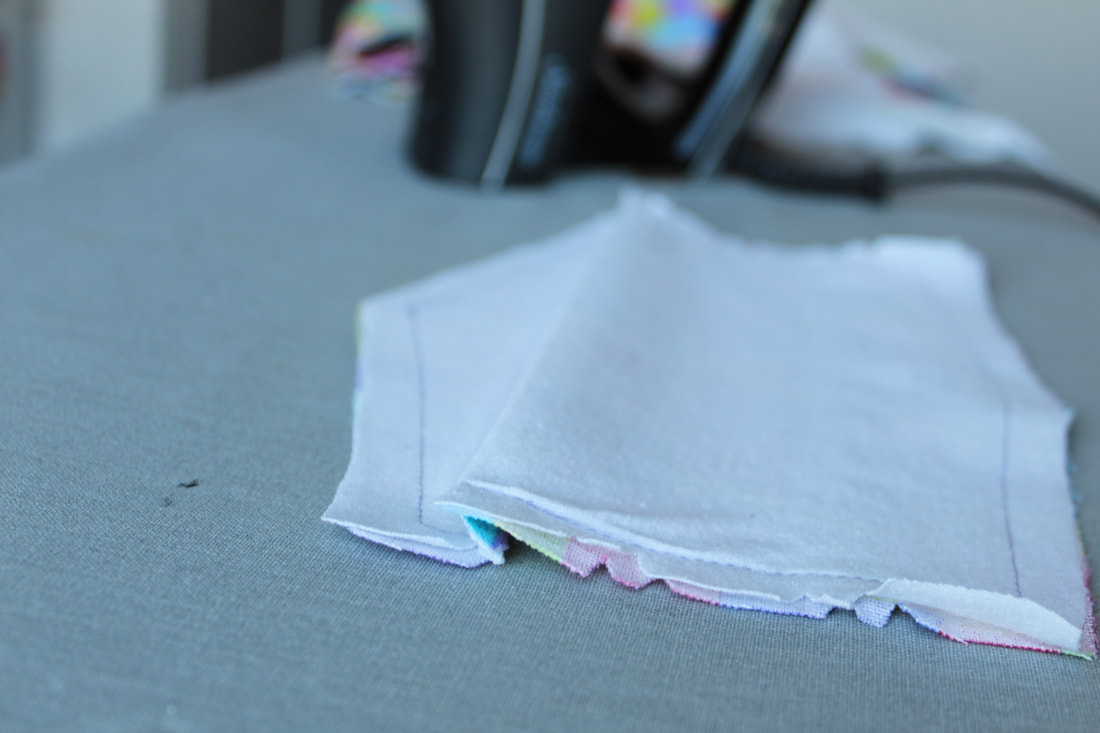
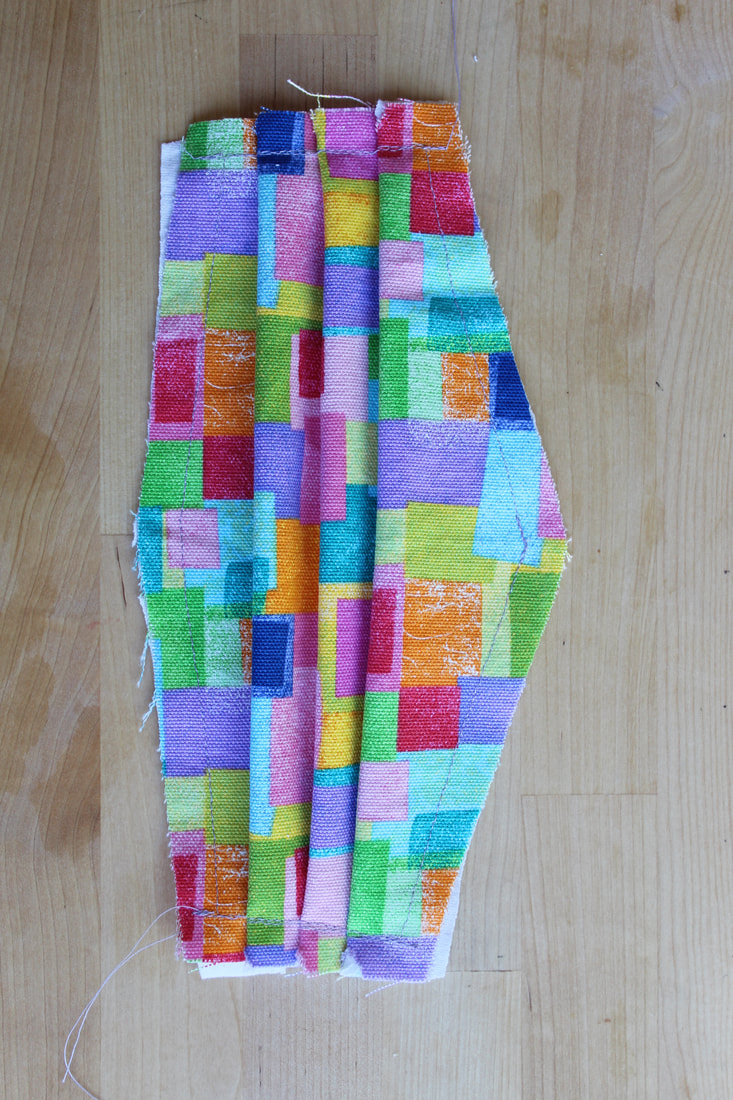
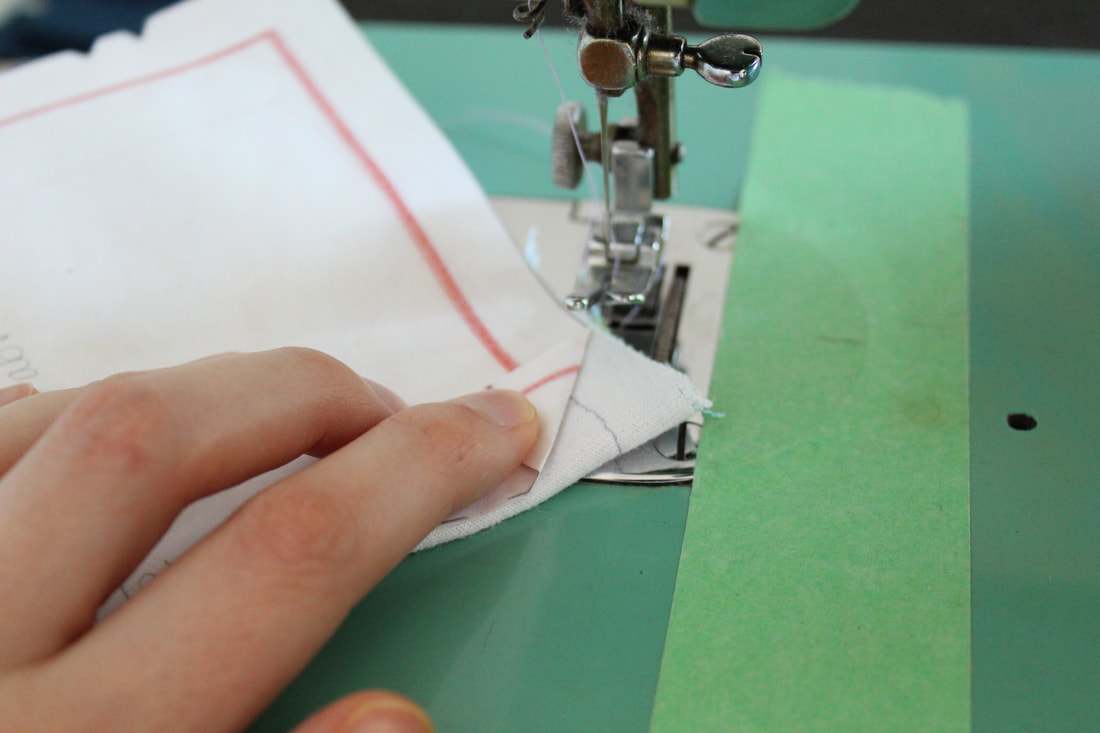
Step 3: Attach Your Layers
Once both layers are cut out, give them a quick iron, and then stack them. Keep the front of the fabric facing away from you, place the t-shirt layer on top of that one. Sew the two together, following a 1/2 inch seam allowance. The t-shirt may stretch when you're doing this, no worries. You can trim any access after or just ignore it until later.
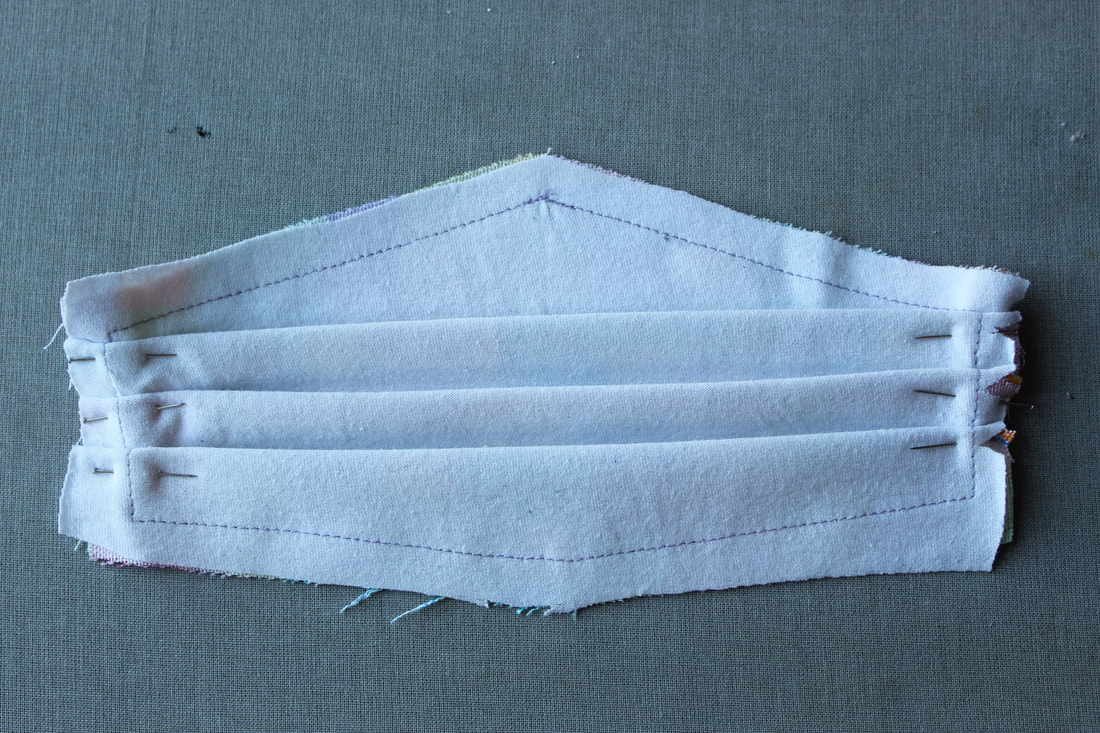
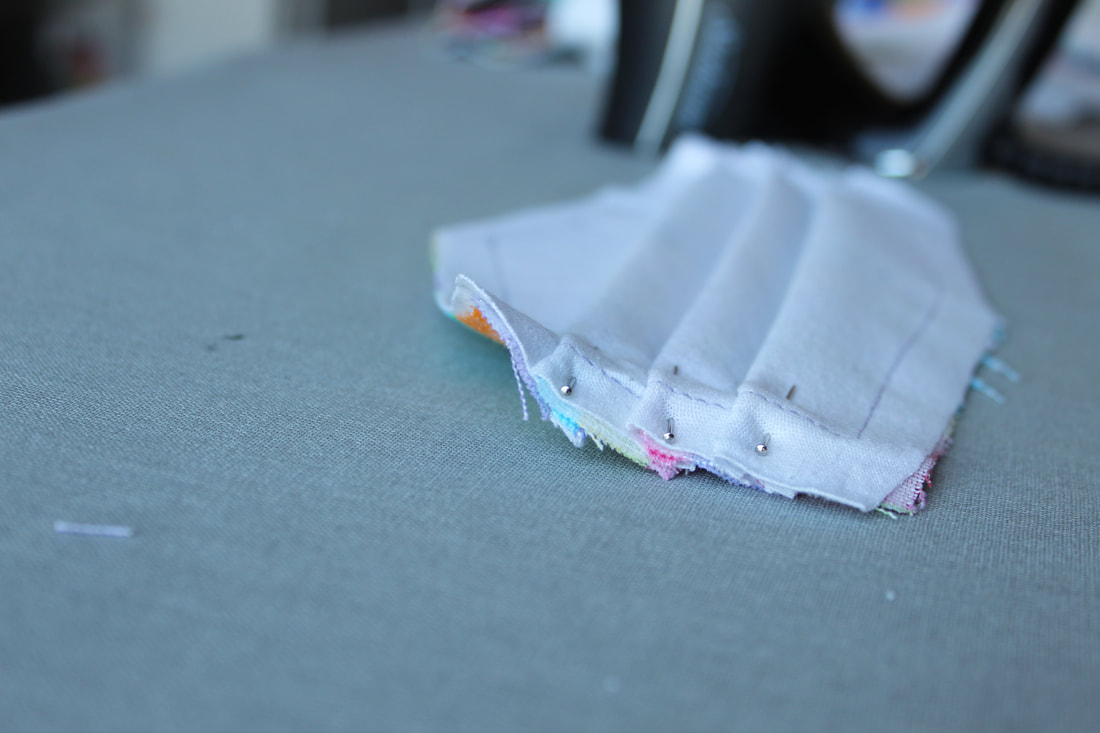
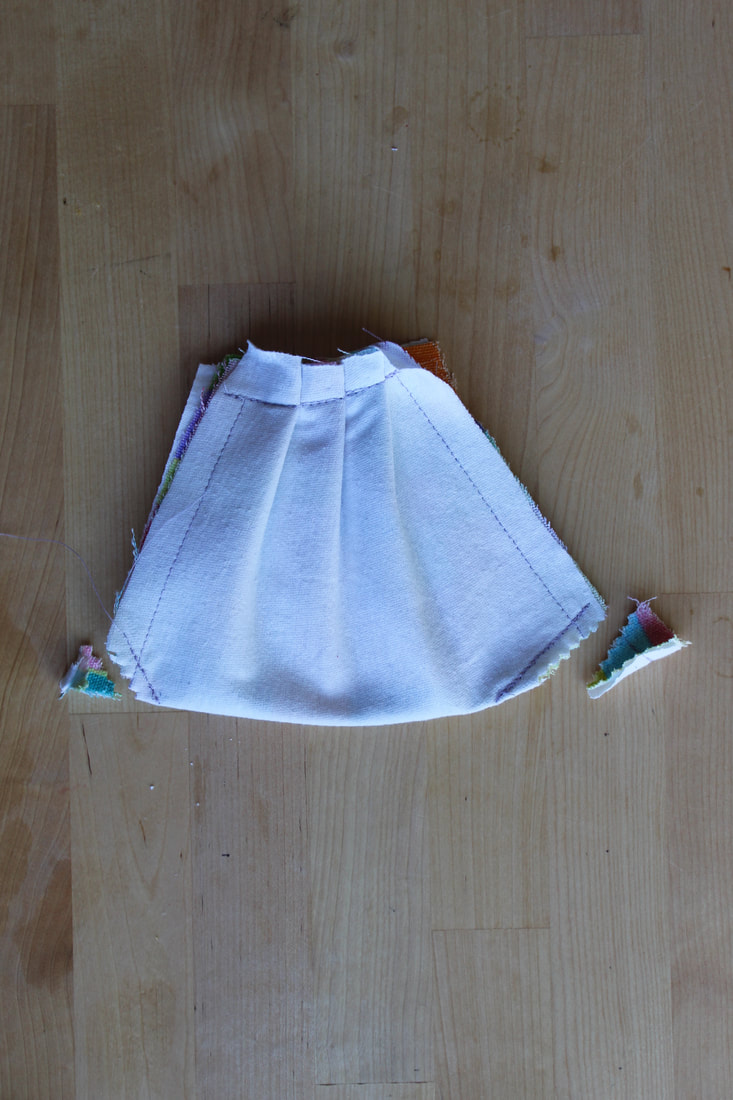
Step 4: Pleat
The pleating can be a bit confusing at first. Stick with it, try to think logically, and take your time getting the hang of it. Follow the notches on your non-stretchy fabric, AKA not the t-shirt. If they line up, you're better than me.
Start with your fabric face down, point facing away from you.

Fold the fabric up until you've reached the last notch. Iron a crease from the two uppermost notches to each other.
Fold the fabric back down from the next notch. This action completes your first pleat. Iron & pin in place.
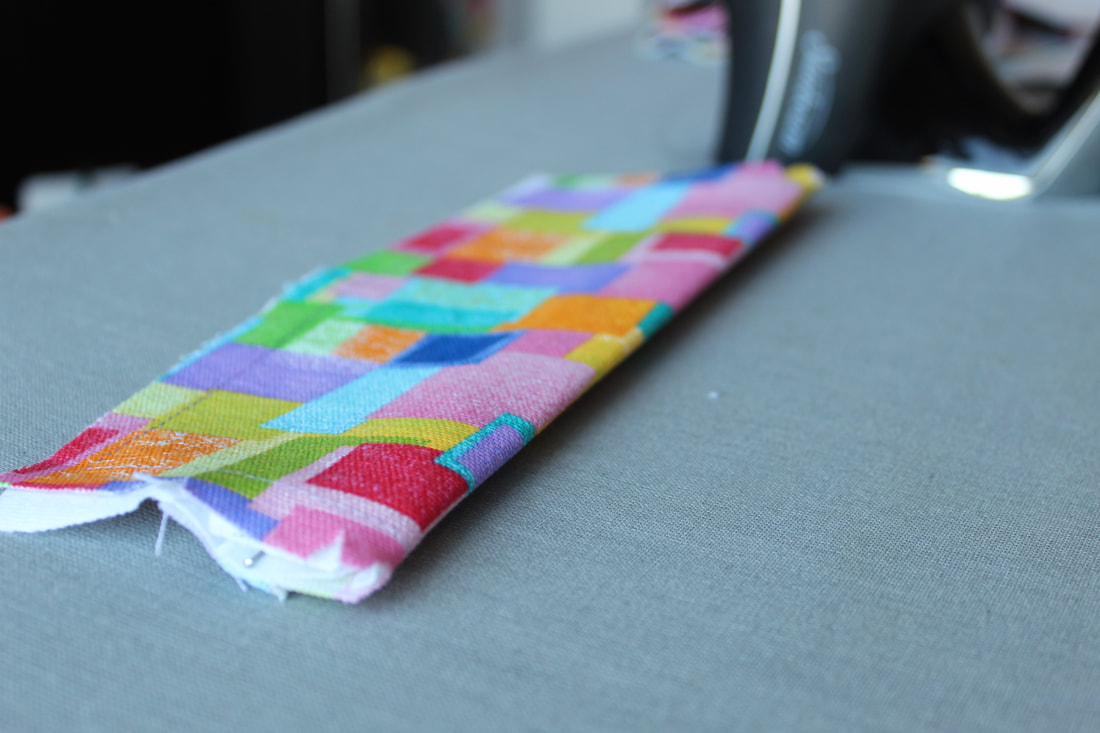
Repeat the process with the next two notches, folding up to the higher one, then down from the lower one, ironing to save.
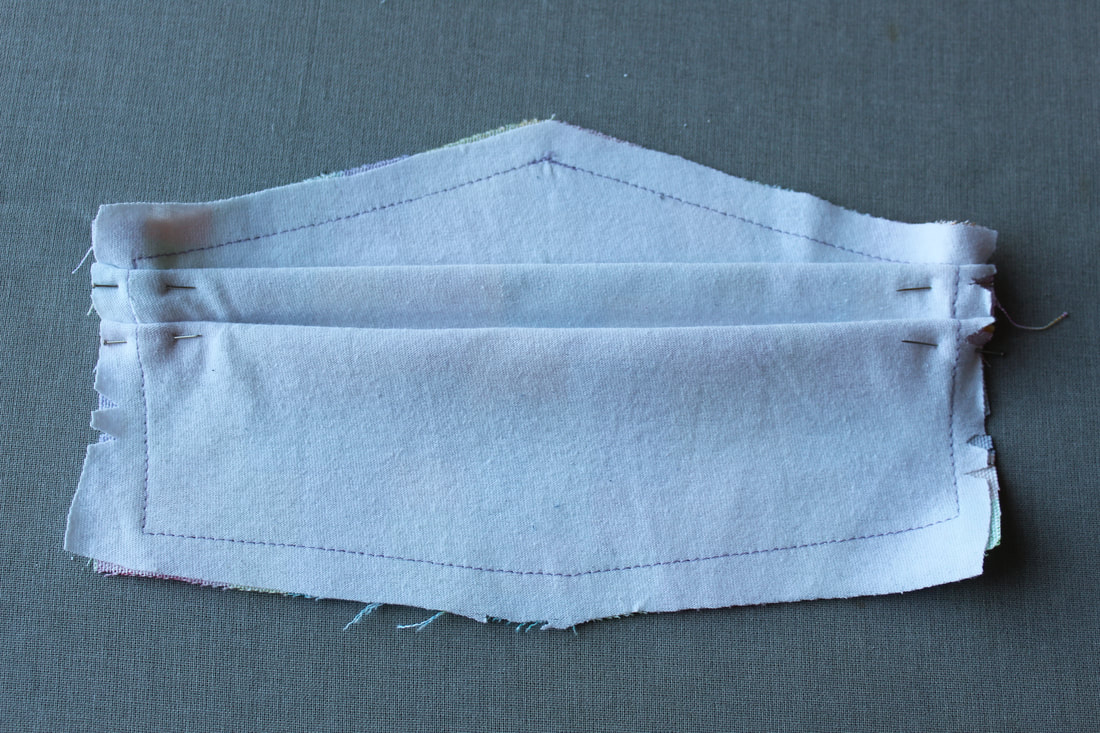
Two completed pleats.
ComPLEAT :)
Each pleat is about 1/4 of an inch.
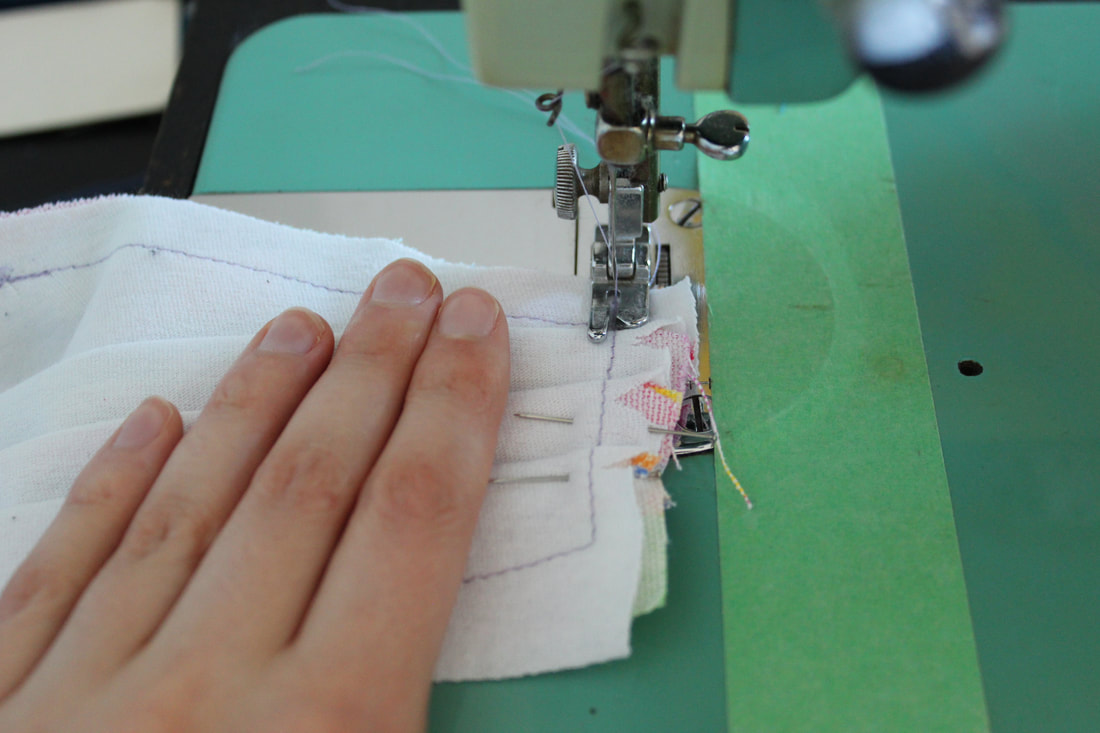
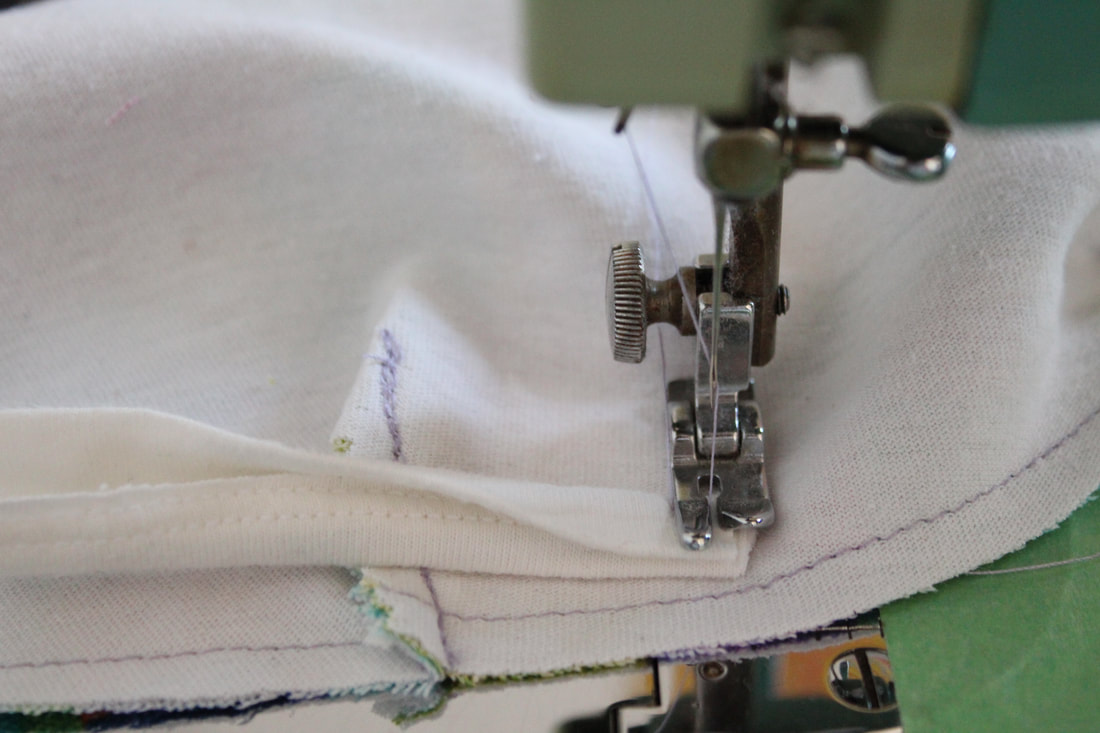
Sew down pleats with 1/2 seam allowance. Just follow your other stitched seam! Remember to backtack at each end (3 stitches back, 3 stitches forward).
Step 5: Add darts, trim sides

Fold your mask in half, find your pattern. See those red diagonals? Those are your darts that will help the mask fit you better.
Align the pattern to the top of your mask.
Align the pattern to the top of your mask. You can draw yourself a line or mark the dart with pins.
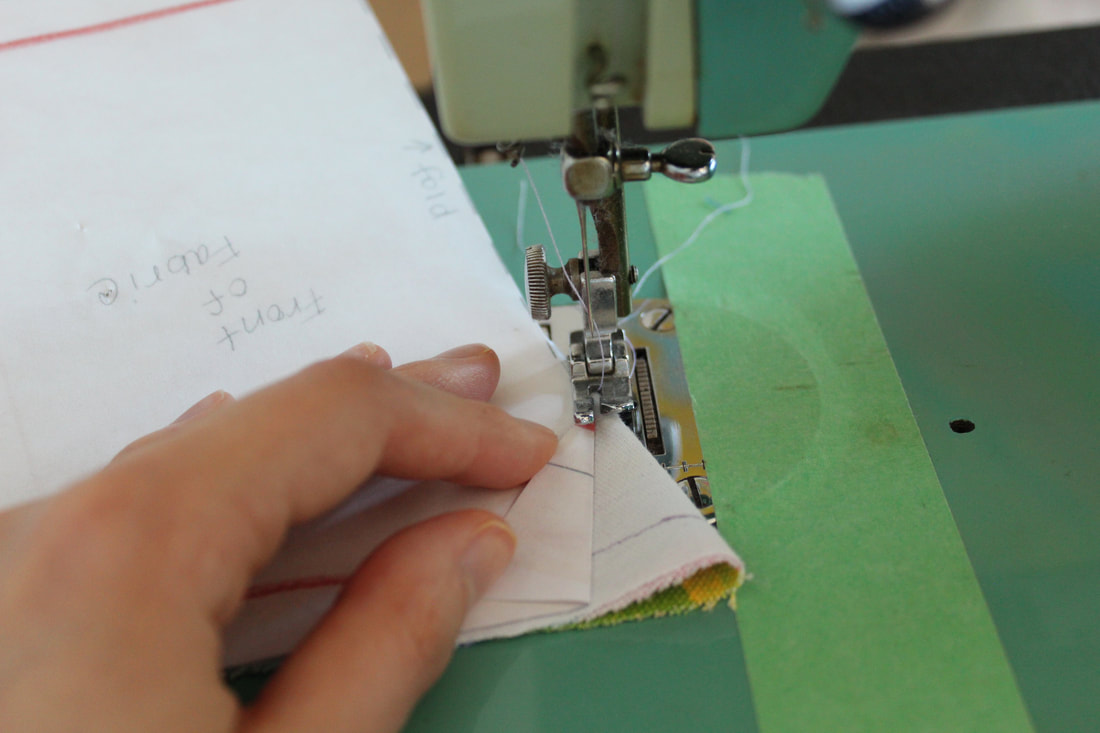
I personally just choose to sew directly next to the paper. I fold the dart out of the way and sew as straight as I can, not catching the paper. Remember to backtack and you can reinforce these darts by sewing them a few times if you'd like.
Repeat with the other dart at the bottom of the mask.
Once both are sewn, trim the darts to 1/4 inch. I used pinking shears, but your fabric scissor and a straight line is also fine.
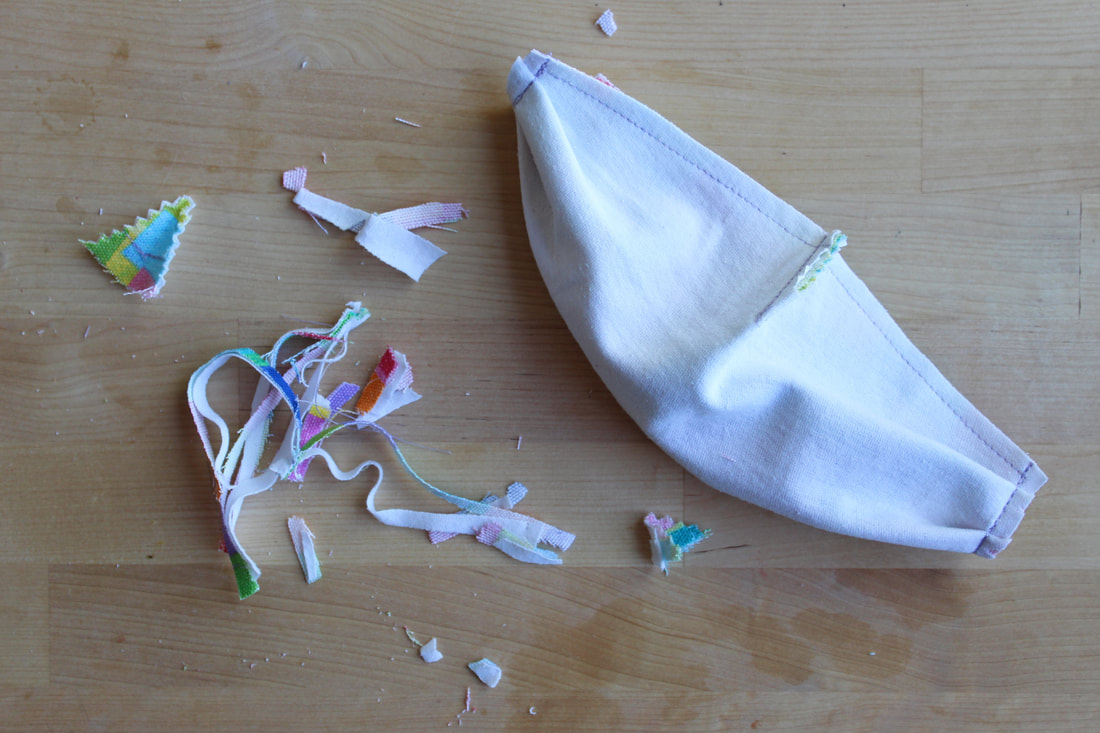
Using your fabric scissors, trim all edges to 1/4 inch.
Step 6: Add fitted nose piece** OPTIONAL
On lighter fabric, this may be a bit too much. The wire over the nose is extremely helpful for fit, and if you wear glasses if may be a bit helpful as well.
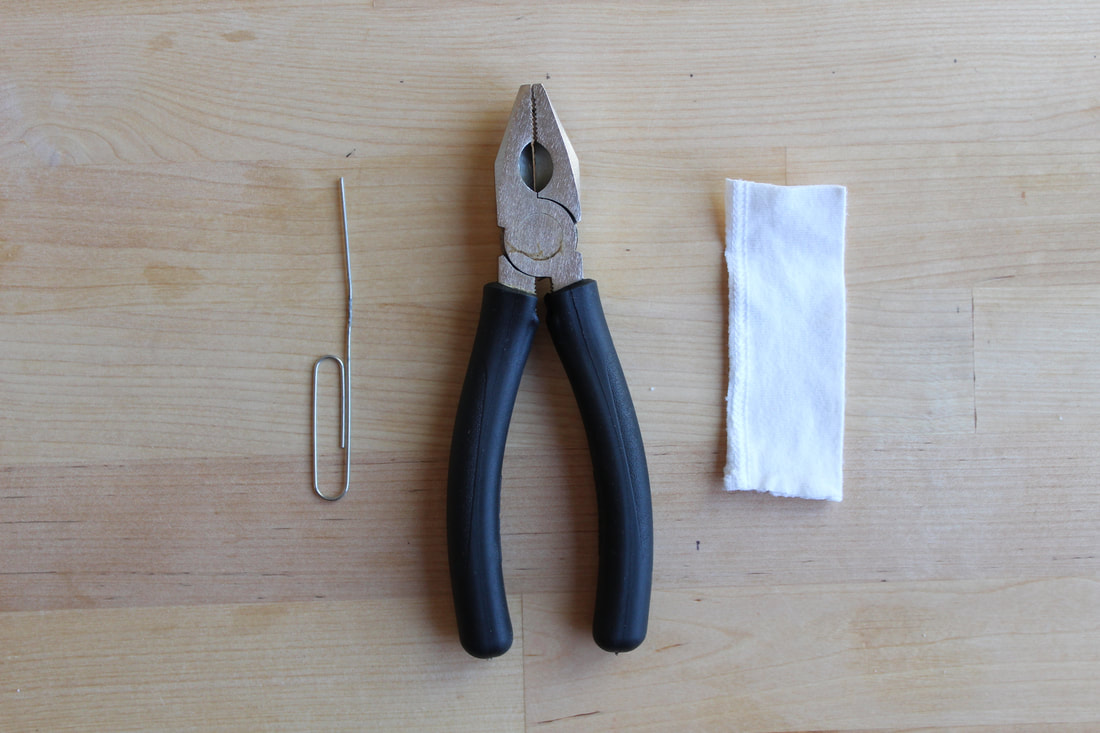
Take your paperclip, wire cutters, and piece of hem.
I go by what looks right, but I added in this ruler for a guide. Cut a piece of paperclip, about 2 inches long (I ended up trimming both the paperclip and piece of hem).
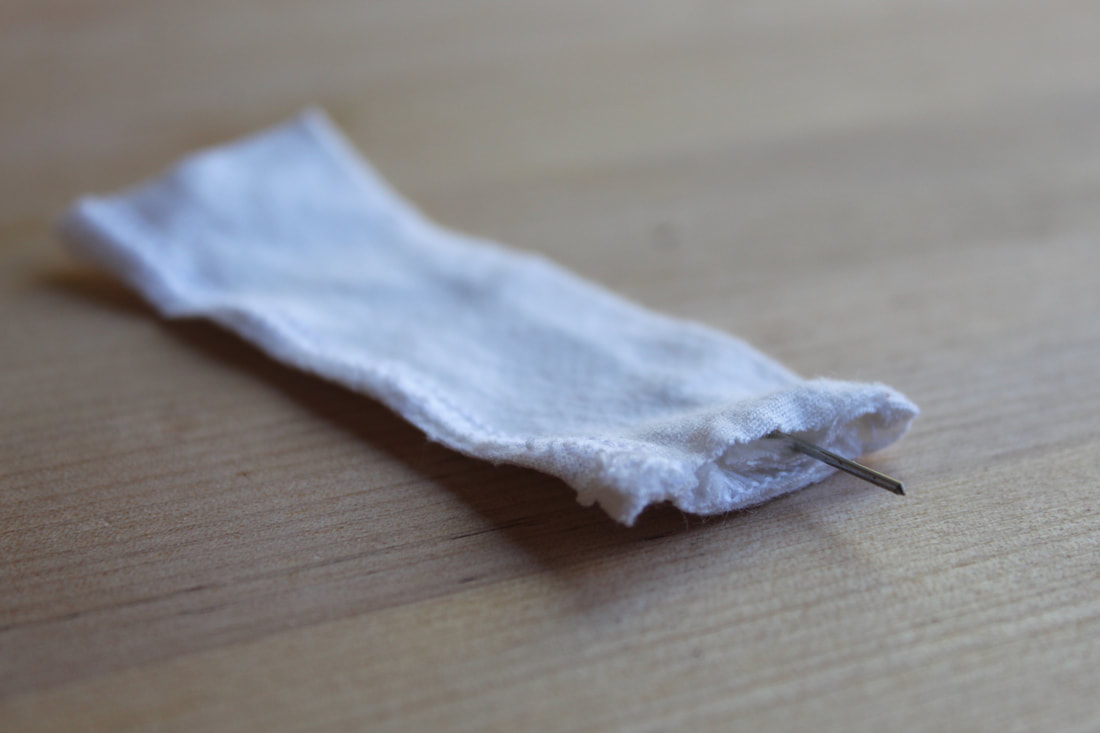
The piece of hem should be able a 1/2 inch longer than the paperclip. Place the paper clip inside the hem.
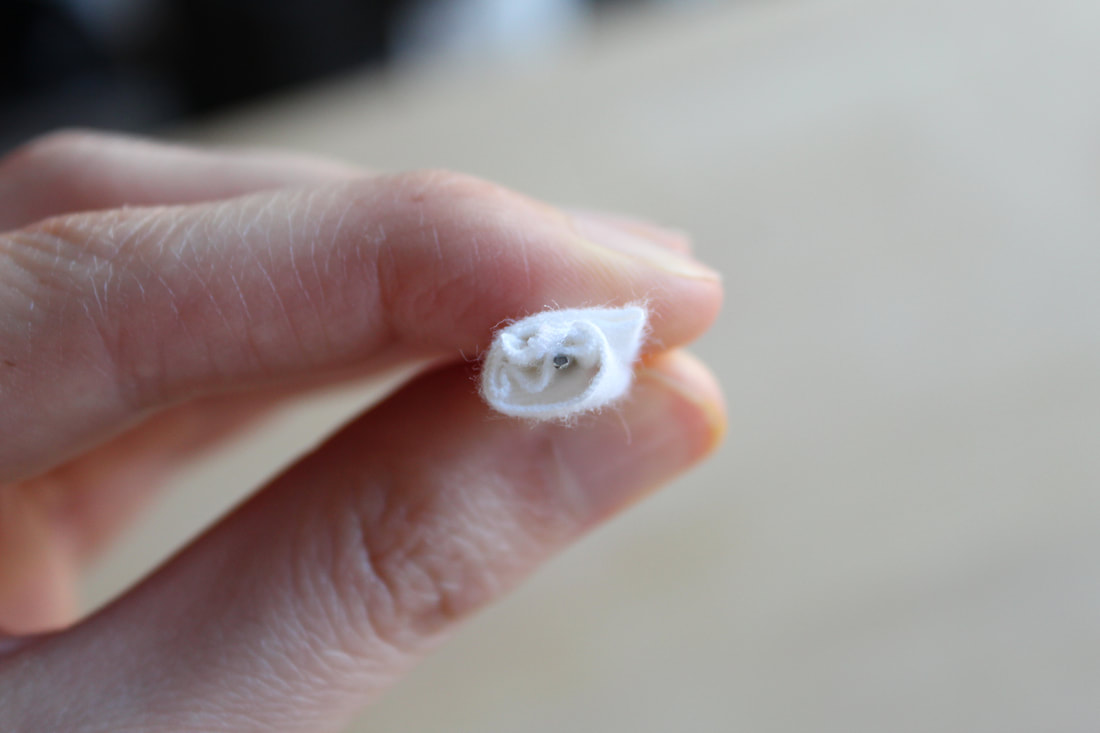
Wrap it up, I aim for 2 folds, almost like how you would fold a letter for an envelope.
Center your paperclip burrito a smidge below your seam on the larger dart. This part gets a bit sloppy, if you can find a way to pin it, awesome.
Sew first side down, extending your stitch over the sides a bit to help anchor it. Backtack/redo this stitch a few times, then sew a rectangle around the paperclip piece, keeping your needle down and lifting the presser to rotate the fabric at each corner. Do the extra stitching at the other end, just as you had done where you started. Feel free to do this same rectangle a couple times to strengthen it. Leaving a little wiggle room for the paperclip is ideal.
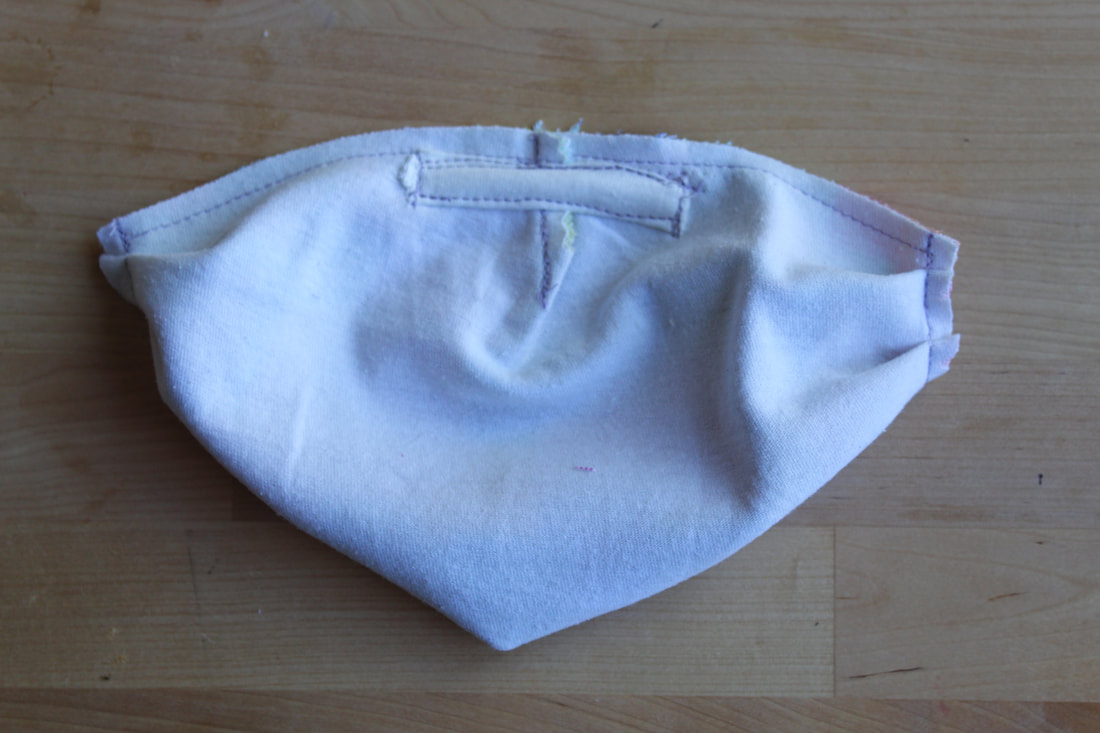
Not the prettiest, but very useful.
Step 7: Adding the binding/ties
Here's where you can choose your own adventure. The first time I made these masks, I followed Jessica's tutorial and made my ties from my front fabric. If you're doing that, follow instruction A. I happened to have some soft woven ribbon from a duvet cover from West Elm that was ~3/4 inch wide, I also made one of these masks using that and instruction B will dive into that more. For this tutorial and mask, I used bias tape. Follow instruction C for bias tape.
A. Binding & Ties from Fabric:
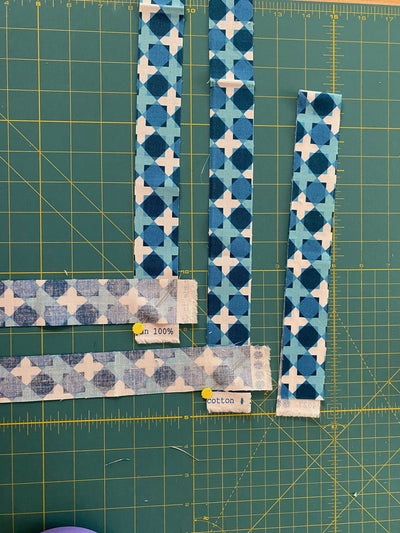
- You need two 40" x 1.5" pieces of fabric, plus another 1.5" wide strip about 6-10" inches long.
- If your fabric is long enough to cut those 40" pieces, phenomenal. If not, don't fret! You can sew together two 20" pieces. You will need four 20" pieces in total to make one mask, plus that extra, shorter strip.
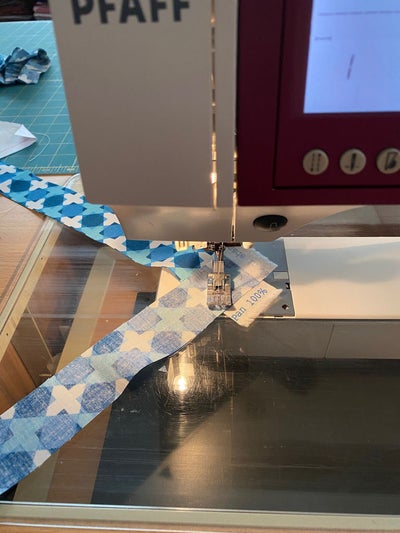
- Take 2 strips and pin at 90 deg angles. Repeat with 2 more strips.4.Sew strips together at 45 deg angle.
- Trim seams at 1/4 inch and press with iron.
B. Binding & Ties from Ribbon:
- Just make sure your ribbon isn't the sort of ribbon that will fray, that it's comfortable as a tie and won't untie easily. The one I used was pretty soft.
- For the next step, just fold your ribbon over the raw edge evenly, pin in place, and sew. Keep your stitch somewhat close to the ribbon edge.
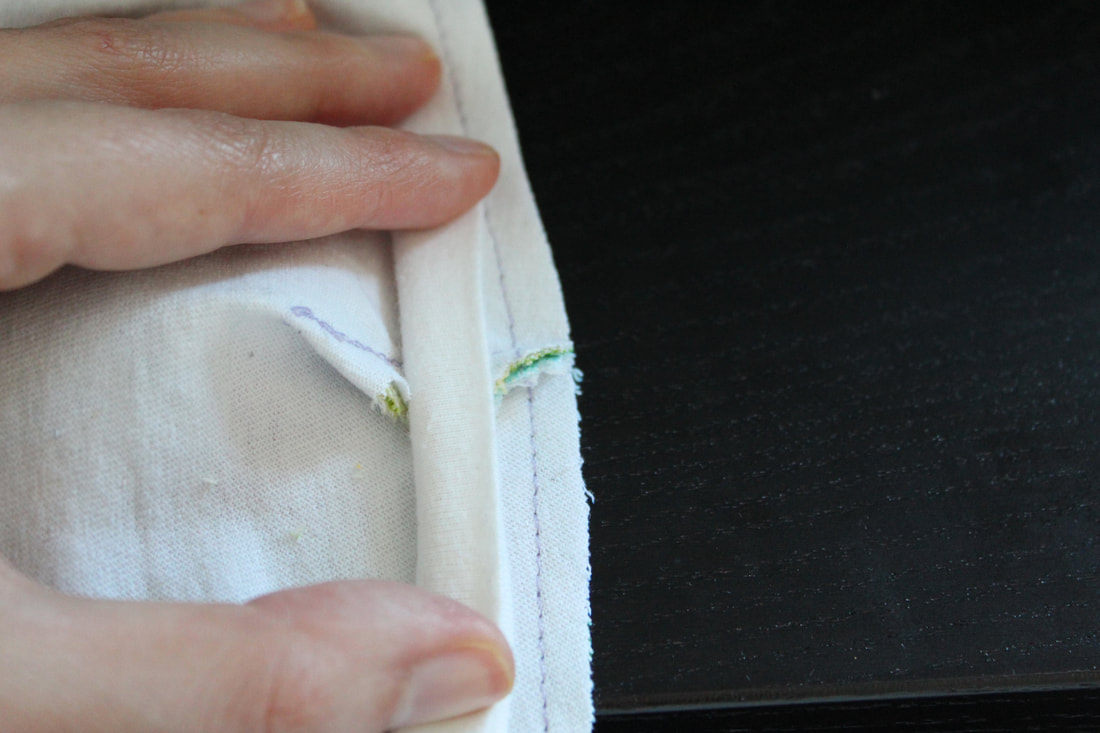
C. Binding & Ties from Bias Tape:
- Easiest version because it cuts out the ironing necessary for the fabric ties and still gives you a very clean edge. I've been using whatever random size double fold bias tape I had passed down to me in a bag of sewing supplies and if it's too wide, cutting it in half. If it's too narrow, I've been trimming my seams lower once initially attached.
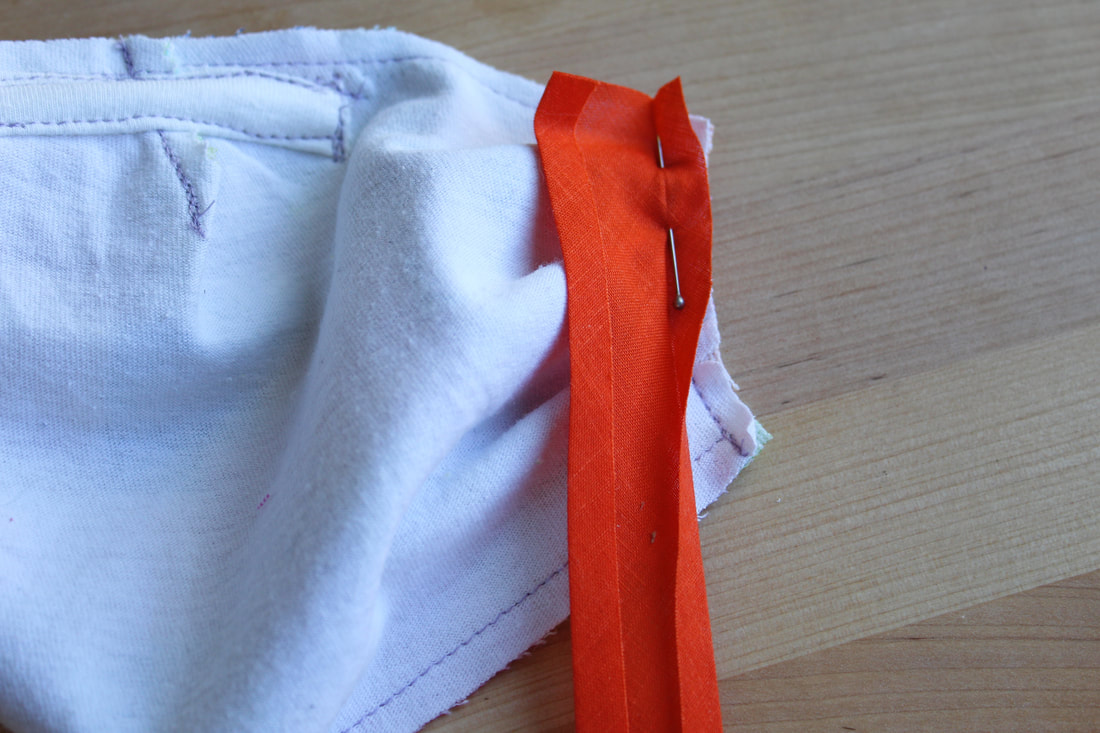
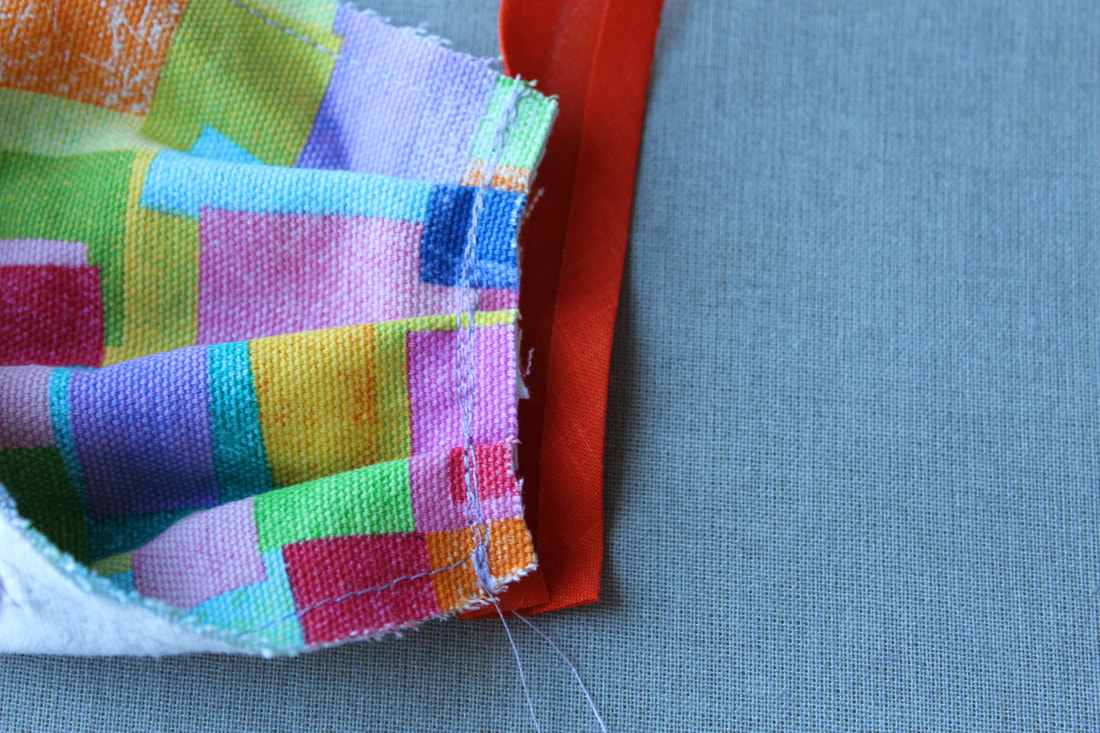
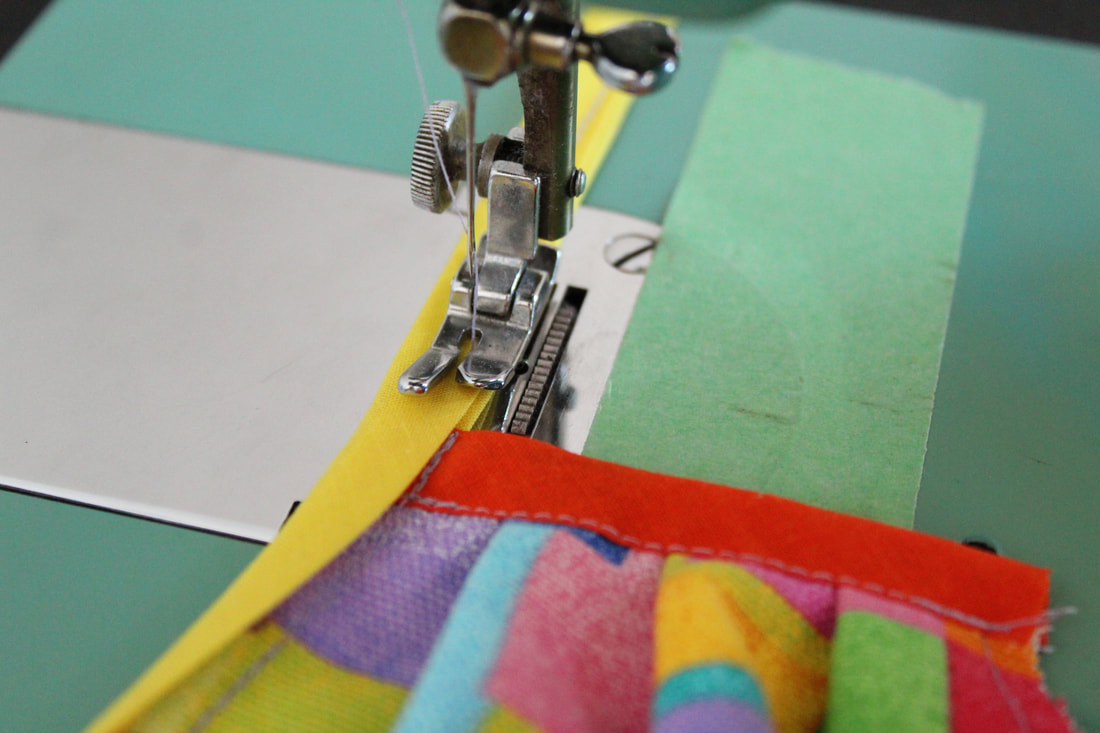
A & C: Align your binding to a short edge of your mask. Pin in place if you'd like.
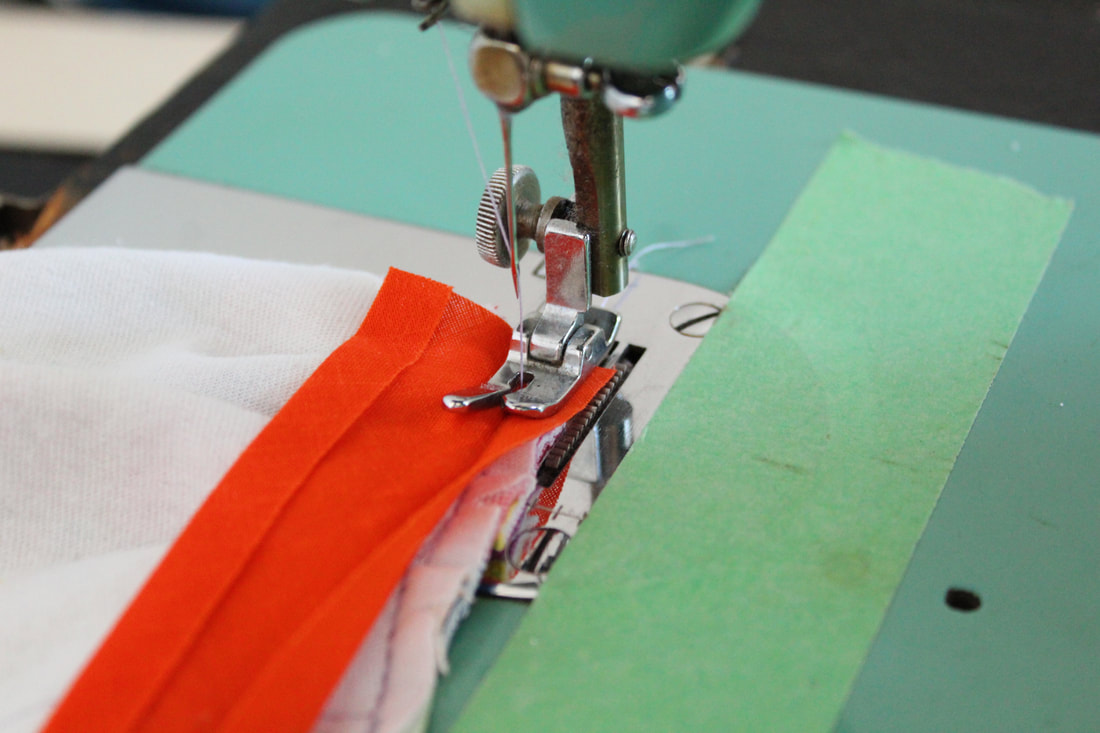
A & C: Sew, following the seam already in the fabric (should be at 1/4 inch!) and if you're using bias tape, align the crease with the seam.
A: You'll want to press this seam open now.
A: Press in 1/4 inch from the other side of the fabric strip.
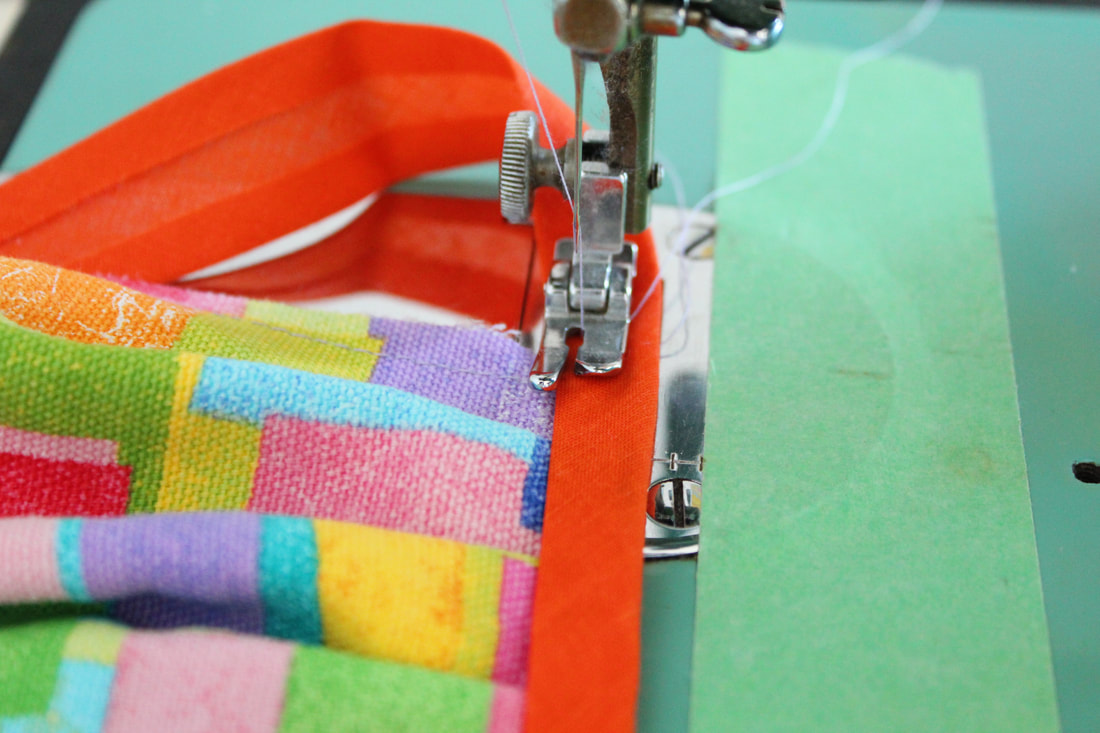
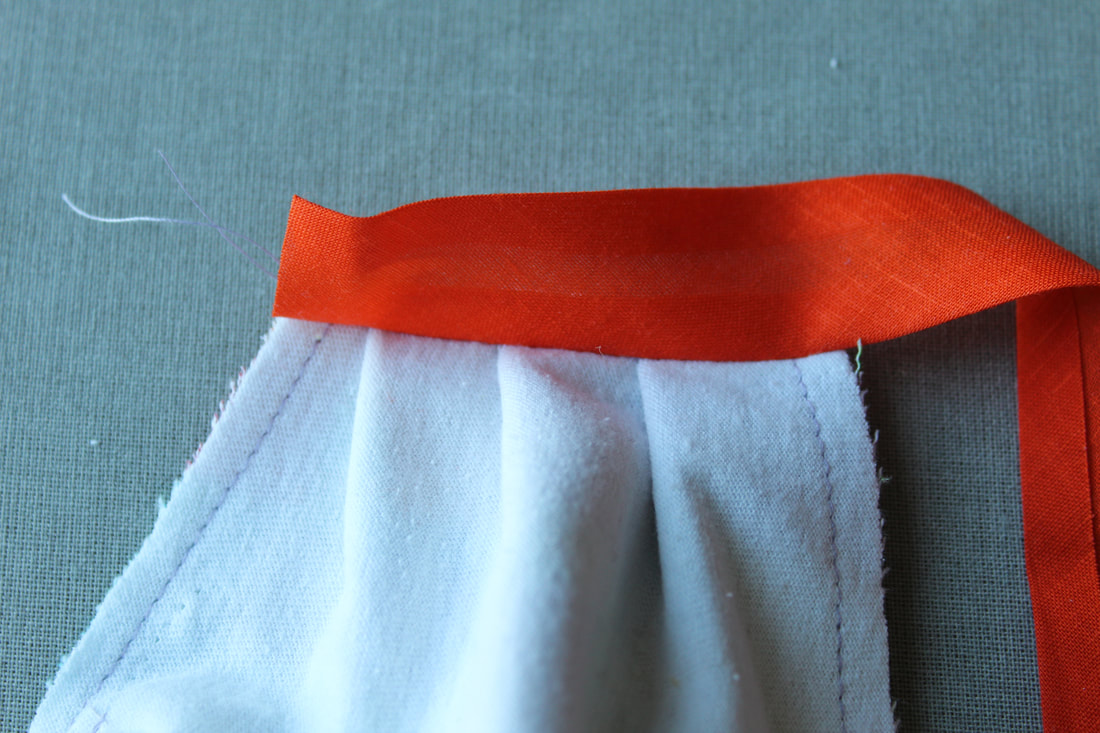
A, B, C: Fold over the fabric or ribbon to sandwich the raw edge and stitch down.
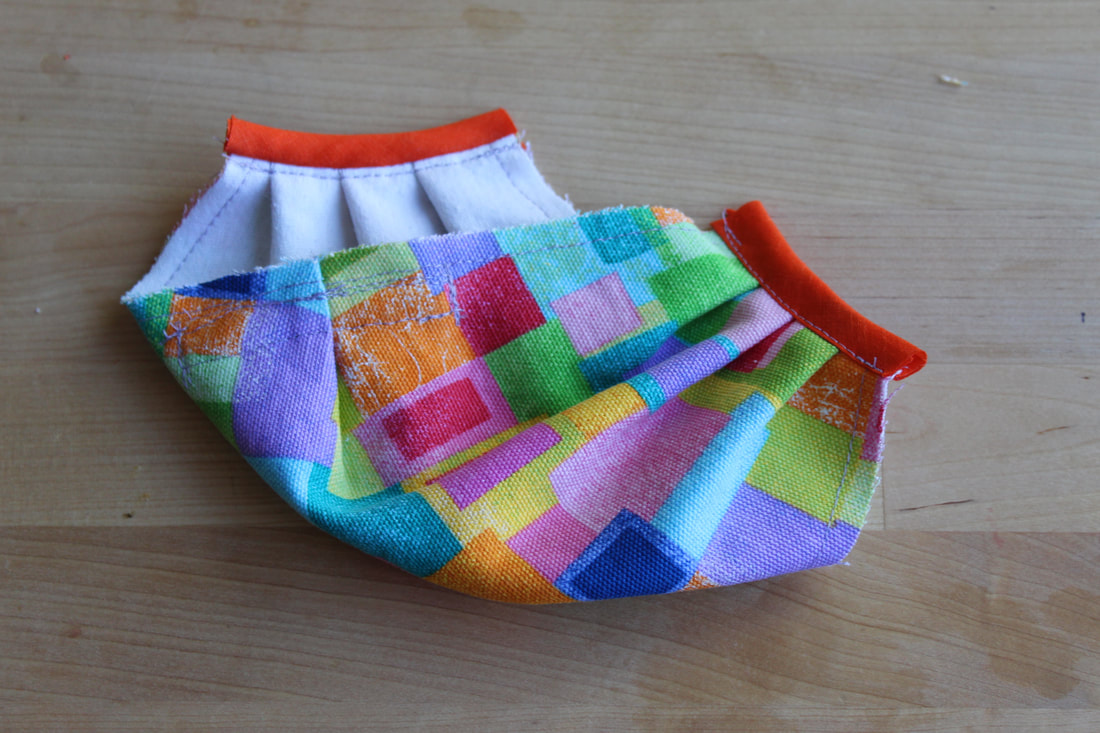
Trim the side binding, use the remainder to repeat on the other side.
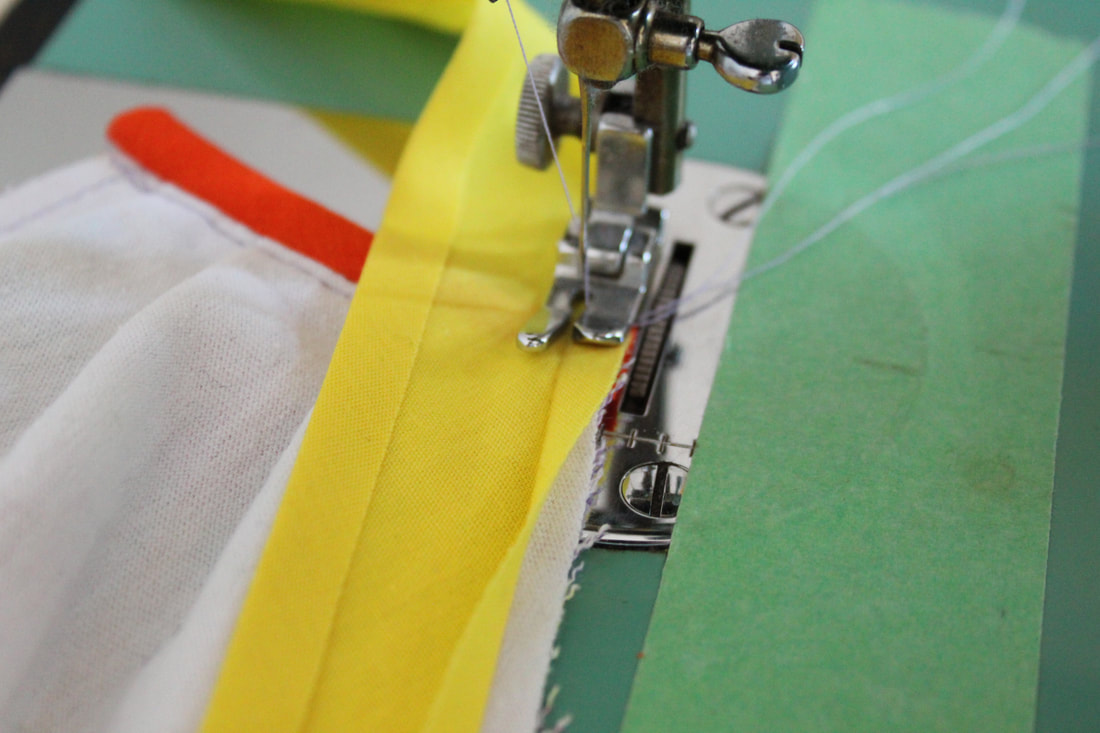
Take your two 40" strips (one at a time) and mark the center (I do so mentally) and match the center to the seams of the darts. A & C: start at the end of the mask and sew the tie the same way you did the side binding.
A, B, & C: Fold the tie in half, backtack at the end of it, then stitch down the length of the tie, in the process sandwiching the raw edge of the mask as well. Repeat for second side.
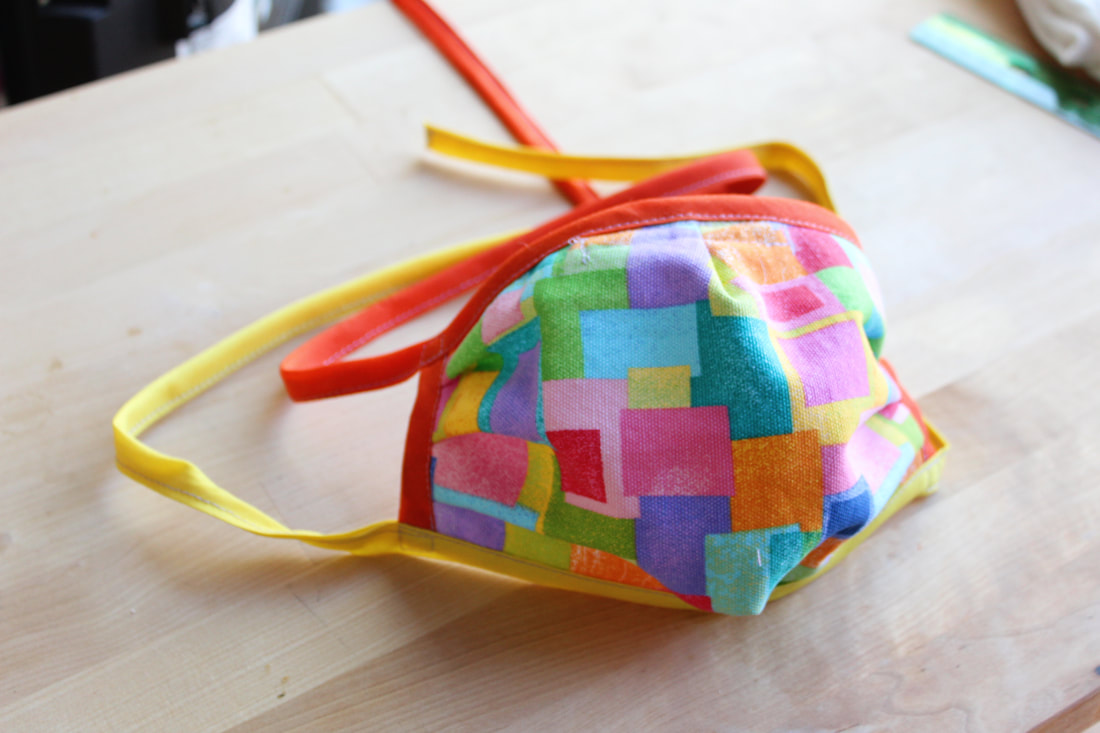
YOU DID IT! You made a fabric face mask!
Great job! Stay healthy!

Samantha Kirsch
DoneGood Designer & Advocate for Good
Socially responsible brand enthusiast, pizza bagel fan, changemaker through and through.
Leave a comment